Author: Precious Beauties
• 8:11 PM
Supplies Needed:
Tube: I am using one of Ismael Rac, you can find him here
Template: Template_94_Sunny Days by Dee, you can find that here
Scrapkit: Happy Day by Jaelop Designs found here

Open the template, duplicate and close the original. Delete the copyright, and resize all layers by 90%. Resize canvas by 700 x 700. I resize all papers used by 20%.

Select the black rectangle, go to Selections - Select All - Float - Defloat.

Copy and paste a paper of choice above the selected layer. Position to your liking. Go to Selections - Invert and hit delete on the keyboard. Delete the template layer.

Repeat the above steps for the remaining template layers. Add a drop shadow to all desired layers.

Select the top left small white square, go to Selections – Select All – Float – Defloat. Copy and paste the tube as a new layer. Position to your liking inside the square (I used the Pick tool to rotate the tube), with the tube still selected go to Selections – Invert and hit delete on the keyboard. Repeat these steps with the bottom square.

Open Element Word Art 3, resize by 15%. Copy and paste as a new layer. Place to the right inside the large circle in the center of the template. Erase any of the word art outside the circle.

Open Element 36, resize by 25%. Copy and paste as a new layer, mirror. Position overlapping the small tubes on the left-hand side. Apply a drop shadow.

Open Element 6, resize by 8%. Copy and paste as a new layer. Place in the upper left corner of the small bottom square. Apply a drop shadow. Duplicate, and place on the bottom right side of the word art “are here again”. Duplicate once more, and place on the right-hand side of the large circle, I place mine near the top.

Open Element 8, resize by 10%. Copy and paste as a new layer. Place overlapping the red flower near the word art. Apply a drop shadow.

Open Element 9, resize by 10%. Copy and paste as a new layer. Place overlapping the red flower near the top of the template. Apply a drop shadow.

Open Element 40, resize by 15%. Copy and paste as a new layer. Place on the left-hand side near the middle of the template. Apply a drop shadow.

Open Element 37, resize by 15%. Copy and paste as a new layer. Place on the right-hand side all you done on the left. Apply a drop shadow.

Open Element 23, resize by 15%. Copy and paste as a new layer. Place at the bottom of the template, move this layer below the dotted doodle. Apply a drop shadow. Duplicate and place at the top of the template.

Open Element 10, resize by 10%. Copy and paste as a new layer. Place behind the word art “sunny”. Apply a drop shadow.

Open Element 26, resize by 15%. Copy and paste as a new layer, place on the right-hand side of the two small squares. Apply a drop shadow. Duplicate, mirror, and place a little lower down on the right-hand side of the template.  Erase any of the stem that is out past the frame.

Open Element 21a, resize by 20%. Copy and paste as a new layer. Place at the top of the template, duplicate and mirror. Place to your liking at the bottom of the template. Apply a drop shadow to both layers.

Copy and paste the tube as a new layer, resize if needed. Place in the center of the template, move this layer below the word art and flower bunch. Erase any of the tube the is out past the circle on the bottom. Apply a drop shadow.

Add any copyrights and your name. Crop, resize if desired. Save as a PNG (close background first).

Thank you for trying one of my tuts, I hope you have enjoyed yourself and I look forward to having you back here again!! I would love to see what you have created.
Author: Precious Beauties
• 2:51 PM

Supplies Needed:
Tube of choice, I am using Mishicheskaya found at SATC
Scrap kit Deep Blue by Inzpired Creationz also found at SATC
Mask of choice

My 300th tutorial....HIP HIP HOORAY!!

Open a new image 700 x 700 with a white background.

Open Porthole 1, resize by 80 percent. Copy and paste as a new layer. Place in the upper left hand corner.

Copy and paste a paper of choice below the porthole. Position to your liking, using the Magic Wand click next to the porthole. Go to Selections - Modify - Contract by 10. Select the paper again and go to Selections - Invert and hit delete on the keyboard.

Open Fish 5, resize by 40 percent. Copy and paste as a new layer in the top left corner inside the porthole. Duplicate and mirror, place on the right hand side inside the porthole. Change the Opacity to 65 on both layers.

Open Bubbles 2, resize by 60 percent. Copy and paste in the top center of the porthole.

Open Jelly Fish, resize by 25 percent. Copy and paste as a new layer. Place in the bubbles. Lower Opacity to 70.

Open Light Ray, resize by 40 percent. Copy and paste as a new layer. Place in the upper left hand side on top of the porthole. Erase any of the ray on the outside of the porthole.

Open Water, resize by 60 percent. Copy and paste as a new layer. Place below the porthole on the left hand side. Duplicate until you have water in front of the porthole. Don’t forget to mirror or flip a few.

Open Sand 2 and Sand 3, resize to your liking, place under the water, move to the edge. See my tag if needed.

Open Sea Plant 1, resize by 40 percent. Copy and paste as a new layer. Place in the left hand side at the bottom of the porthole. Duplicate and place on the right hand side in the same matter. Apply a drop shadow.

Open Sea Plant 3, resize by 40 percent, copy and paste as a new layer. Place on the right hand side under the sea plant we just added. Move up a little. Apply a drop shadow.

Open Star Fish 3, resize by 25 percent. Copy and paste as a new layer. Place in the water to your liking. Duplicate as many as you like.

Copy and paste the tube as a new layer. Place in the water in front of the porthole. Resize if needed. Apply a drop shadow.

Open Star Fish 1, resize by 12 percent. Copy and paste as a new layer, place in the water to your liking. Duplicate as many as you like. Apply a drop shadow.

Open a couple Sea Shells, resize to your liking and place around the water and tube. Apply drop shadow to all layers.

Copy and paste a paper above the white background. Apply the mask to this layer. Delete the mask layer and merge group.

Add any copyrights and your name. Crop, resize if desired. Save as a PNG (close background first).

Thank you for trying one of my tuts, I hope you enjoyed yourself. I look forward to having you back here again. I would love to see what you have created.
Author: Precious Beauties
• 10:12 PM

Supplies Needed:
Tube of choice, I am using Zlata_M found at PFD
Scrap kit Summer Breeze by Tasha’s Playground, you can find this kit at SATC
Mask of choice

I must admit, its nice to have a color change! I been doing so much with pink lately I was starting to believe it was the only color used for kits these days…lol. Any way onto the tutorial!

Open a new image 700 x 700 with a white background.

Open Frame 2, resize by 110 percent. Copy and paste as a new layer. I colorized the frame to match the tube, this is up to you. Using the Magic Wand click inside the frame, go to Selections - Modify - Expand by 5.

Copy and paste a paper of choice below the frame, resize if needed. Go to Selections - Invert and hit delete on the keyboard. Do not deselect yet.

Open Waterfall, mirror and copy and paste as a new layer. Place on the right hand side inside the frame. Hit delete on the keyboard when you are happy with the position.

Open Water, copy and paste as a new layer. Place on top of the paper to your liking, duplicate and mirror. Position both an once happy hit delete on the keyboard. Select the other side and hit delete on the keyboard.

Open Sparkles 2, mirror and paste as a new layer. Position to your liking and then hit delete on the keyboard. Deselect.

Apply a drop shadow to the frame.

Open Bird, resize by 25 percent. Copy and paste as a new layer. Place on the left hand side to your liking, apply a drop shadow.

This is also up to you, I colorized the entire inside of the frame to match the tube, if you want to do this, make a gradient out of two colors from the tube. Add a new layer above the background for the frame. Select the background for the frame, go to Selections - Select All - Float - Defloat. Select the new layer you added and flood fill with the gradient. Change the Blend Mode to Color or Color (L), depends which you like best…lol.

Copy and paste the tube as a new layer, place inside the frame. Resize if needed. Erase any of the tube at the bottom you don’t want showing. Apply a drop shadow.

Open Rocks, resize by 60 percent.  Copy and paste as a new layer. Place at the bottom in the center, this should be outside the frame. Apply a drop shadow.

Open Drink, resize by 40 percent. Copy and paste as a new layer. Place on top of the rocks so it looks like its sitting on top. Apply a drop shadow.

Open Shell, Shell 2 and Shell 3, resize all shells to your liking, these are going to be placed along the rocks at the bottom of the tag. Copy and paste all shells as a new layers, position to your liking across the bottom of the tag, apply a drop shadow to all layers.

Open Flowers, duplicate. Resize one by 50 percent and the other by 40 percent. Copy and paste the smaller flowers as a new layer. Position around the bottom of the tag among the shells, don’t forget to mirror a few, apply a drop shadow to layers. Copy and paste the larger flowers as a new layer. Place in the top left corner on top of the frame.

Open Flower 2, duplicate. Resize one by 40 percent and the other by 30 percent. Copy and paste the larger flower as a new layer. Place in the upper left hand corner on top of the frame next to the other flowers. Apply a drop shadow and duplicate mirror. Place on the other side. Copy and paste the smaller flower as a new layer. Place at the bottom of the tag among the shells and other flowers. Apply a drop shadow. Duplicate as many as you like.

Open Décor 2, resize by 60 percent. Copy and paste as a new layer. Place on the left hand side behind the shells and other things. Apply a drop shadow. Duplicate and mirror. Reposition if needed on the right hand side.

Open Swirl, resize by 60 percent. Copy and paste as a new layer. Place at the bottom of the tag, move this layer below the others. Apply a drop shadow. Duplicate and place up in the frame behind the tube.

Open Sand, copy and paste as a new layer. Place at the bottom of the tag behind the other layer. Erase parts of the sand to make it smooth.

Open Shell Chain, copy and paste as a new layer. Place at the bottom of the tag to your liking. Apply a drop shadow.

Open log, resize by 40 percent, mirror. Copy and paste as a new layer. Place in front of the décor on the right and left hand side. Apply a drop shadow.

Add a new layer above the background layer. Make a gradient out of two colors that match the tag, flood fill this layer with the gradient. Apply the mask to this layer. Delete the mask layer and merge group.

Add any copyrights and your name. Crop, resize if desired. Save as a PNG (close background first).

Thank you for trying one of my tuts, I hope you have enjoyed using it and I look forward to having you back here again!! I would love to see what you have created.
Author: Precious Beauties
• 2:59 PM

Supplies Needed:
Tube of choice, I am using Robert Alvarado found at PTE
Scrap kit Summer Fun by Gina’s Gems, you can find this kit at Taggers Delight.
Template 417 by Missy
Mask of choice

Open the template, duplicate and close the original. Delete the copyright and resize all layers by 85 percent. Resize canvas by 700 x 700 and flood fill background with white.

Select the layer Small Rectangle, go to Selections - Select All - Float - Defloat.

Copy and paste a paper of choice above the selected layer. Position to your liking. Go to Selections - Invert and hit delete on the keyboard. Delete the template layer and apply a drop shadow.

Repeat the above steps for the remaining template layers.

Select the background for the frame on the left hand side, copy and paste the tube as a new layer. Resize if needed. Mirror and place in the top frame. Duplicate, mirror and place in the middle frame closest to the circle. Duplicate, mirror and place behind the one you just added. For the bottom frame I just duplicated the one I just added, you cant see much so this is up to you. Apply a drop shadow to all tubes.

Select the background layer for the frame, go to Selections - Select All - Float - Defloat. Click on the top tube and go to Selections - Invert and hit delete on the keyboard. Select each of the other tubes and hit delete on the keyboard. Also you may need to erase some of the tube that overlap in the other frames.

Copy and paste the tube again, this time place to your liking on top of the large circle background, you will have to move this layer down until you find it. Apply a drop shadow. Erase any of the tube outside the circle at the bottom of the template. The easiest way I found to do this is select the background the tube is on, go to Selections - Select All - Float - Defloat. Go to Selections - Invert. Select the tube and start erasing. You should only be erasing what is outside the circle now.

 Open Word Art Cluster 1, resize by 65 percent. Copy and paste as a new layer. Place on top of the rectangle in the middle of the template. Apply a drop shadow.

Open Beach Ball, duplicate. Resize one by 30 percent and the other by 20 percent. Copy and paste the larger ball as a new layer. Place at the corner of the rectangle containing the word art. Apply a drop shadow. Copy and paste the smaller ball, mirror. Position next to the larger ball on the right hand side. Apply a drop shadow.

Open Ribbon 3, resize by 80 percent. Copy and paste as a new layer. Place at the bottom of the template behind the balls. Apply a drop shadow. Duplicate and mirror, flip. Place at the top behind the frame and tubes.

Open Hibiscus, resize by 30 percent. Copy and paste as a new layer. Place next to the small ball at the bottom of the template. Apply a drop shadow. Duplicate and mirror, place on top of the frame between the top and middle tubes.

Open Hibiscus Flower 1, resize by 20 percent. Copy and paste as a new layer. Place in the middle of the two balls. Apply a drop shadow. Duplicate and place beside the flower on top of the frames.

Open Pinwheel, resize by 15 percent. Copy and paste as a new layer. Place on the right side of the frames. Apply a drop shadow, duplicate. Place on the right hand side of the tube above the star.

Open Popsicle 1, resize by 30 percent. Copy and paste as a new layer. Place in front of the small ball. Apply a drop shadow.

Open Popsicle 2, resize by 30 percent, rotate left. Copy and paste as a new layer. Place on the bottom right hand side of the template. Apply a drop shadow.

Copy and paste a paper of choice above the white background layer. Apply the mask to this layer. Delete the mask layer and merge group.

Add any copyrights and your name. Crop, resize if desired. Save as a PNG (close background layer first).

Thank you for trying one of my tuts, I hope you had fun and come back for more! I would love to see what you have created.
Author: Precious Beauties
• 8:35 PM

Supplies Needed:
Tube of choice, I am using Ismael Rac found here
Scrap kit Strawberries and Cream by DCCreations, you can purchase this kit from Scrappin Dollars
Template 77 by Pooker
My supplies (word art) here

Open the template, duplicate and close the original. Delete the copyright, resize all layer by 75 percent. Flood fill the background layer with white.

Select the small circle in the top left corner. Go to Selections - Select All - Float - Defloat.

Copy and paste a paper of choice above the selected layer. Position and resize to your liking. Go to Selections - Invert and hit delete on the keyboard. Delete the template layer and apply a drop shadow.

Repeat the above steps for the remaining template layers.

Select the frame background on the left, copy and paste the tube as a new layer, position to your liking. Apply a drop shadow. Erase any of the tube outside the frame. Change the Blend Mode to Luminance (L). Repeat this for the frame on the right hand side mirroring the tube.

Copy and paste the word art Strawberries as a new layer. Place inside the frame on top of the strip. Change the Blend Mode on the word art to Luminance (L).

Copy and paste the tube as a new layer, place in front of the frame in the center of the template. Resize if needed. Apply a drop shadow.

Open Flower 7, resize by 60 percent. Copy and paste as a new layer. Place at the bottom of the frame on top of the tube. Apply a drop shadow. Duplicate, mirror and flip. Place at the top behind the tube.

Open Bucket 2, resize by 20 percent. Copy and paste as a new layer. Place on the right hand side in front of the white flowers and frame. Apply a drop shadow.

Open Bow 6, resize by 25 percent. Copy and paste as a new layer. Place on the left hand side on top of the strip next to the frame. Apply a drop shadow. Duplicate and mirror and place on the strip on the right hand side.

Open Ribbon 1, resize by 25 percent. Copy and paste as a new layer. Place on the right hand side on top of the frame we added the tube to. Apply a drop shadow. Duplicate and mirror and place on the left hand side on the same manner.

Open Strawberry Bunch 2, resize by 12 percent. Copy and paste as a new layer. Place in the bottom left corner of the frame. Apply a drop shadow. Duplicate and place in the upper right corner of the frame.

Open Strawberry Bucket, resize by 15 percent. Copy and paste as a new layer. Place inside the frame on the left hand side behind the tube. Apply a drop shadow.

Open Strawberry 6, resize by 4 percent, copy and paste as a new layer. Place to your liking. Apply a drop shadow. Duplicate as many times as you like placing around the tag.

Copy and paste the word art Tasty as a new layer. Place in the left hand corner below the dotted line. Duplicate and place in the right hand corner above the dotted line.

Copy and paste Sweet as a new layer. Place inside the strip on the left hand side below the frame with the tube. Duplicate and do the same with the right hand side.

Copy and paste the Delicious word art as a new layer. Place at the bottom of the frame.

Add any copyrights and your name. Crop, resize if desired. Save as a PNG (close background layer first).

Thank you for trying one of my tutorials, I hope you had fun and I look forward to having you back here again! I would love to see what you have created.
Author: Precious Beauties
• 3:48 PM

Supplies Needed:
Tube of choice, I am using IDONTDOHUMANS found at ART
Scrap kit Beach Bound by Freek’s Creations also found at ART
Mask of choice
My supplies (frame template) here

Open a new image 700 x 700 with a white background.

Copy and paste the frame template as a new layer or you can draw out your own, go to Selections - Select All - Float - Defloat.

Copy and paste a paper of choice above the selected layer. Position to your liking, resize if needed. Go to Selections - Invert and hit delete on the keyboard. Delete the frame template if used.

Copy and paste the frame border included in my supplies, there is no drop shadow or anything so you can change the color if needed. Place this below the frame. Merge the two layers.

Click inside the frame with the Magic Wand, go to Selections - Modify - Expand by 3.

Copy and paste a paper for the background as a new layer, position below the frame. Resize if needed. Go to Selections - Invert and hit delete on the keyboard. Apply a drop shadow to the frame.

Open e25, resize by 30 percent, mirror. Copy and paste as a new layer. Place on the left hand side inside the frame near the top of the sand. Apply a drop shadow.

Open e19, resize by 60 percent. Copy and paste as a new layer. Place to your liking on the right hand side inside the frame. Apply a drop shadow.

Open e32 and e30, resize both by 10 percent. Copy and paste both shells as a new layer. Place to your liking, duplicate as many as you like placing them around the sand. Apply a drop shadow to all layers. I also placed a few below the frame.

Copy and paste the tube as a new layer. Place inside the frame, resize if needed. Erase any of the tube outside the frame. Apply a drop shadow.

Open e12, resize by 20 percent. Copy and paste as a new layer. Place inside the frame at the bottom near the tube. Apply a drop shadow.

Open e4, resize by 25 percent, mirror. Copy and paste as a new layer. Place on the left hand side to your liking, apply a drop shadow.

Open e36, resize by 25 percent. Copy and paste as a new layer. Place as a new layer on the frame. Duplicate as many times as you like. Apply a drop shadow to all layers.

Open e 35, resize by 20 percent. Copy and paste as a new layer placing on the frame as you just done with the other flower. Duplicate as many as you like. Apply a drop shadow to all layers.

Add a new layer above the white background. Make a gradient out of two colors from the tag, flood fill the layer with this gradient. Apply the mask to this layer. Delete the mask layer and merge group, resize if needed.

Add any copyrights and your name. Crop, resize if desired. Save as a PNG (close the background layer first).

Thank you for trying one of my tuts, I hope you have enjoyed using it and I look forward to having you back here again! I would love to see what you have created.
Author: Precious Beauties
• 3:06 PM


Supplies Needed:
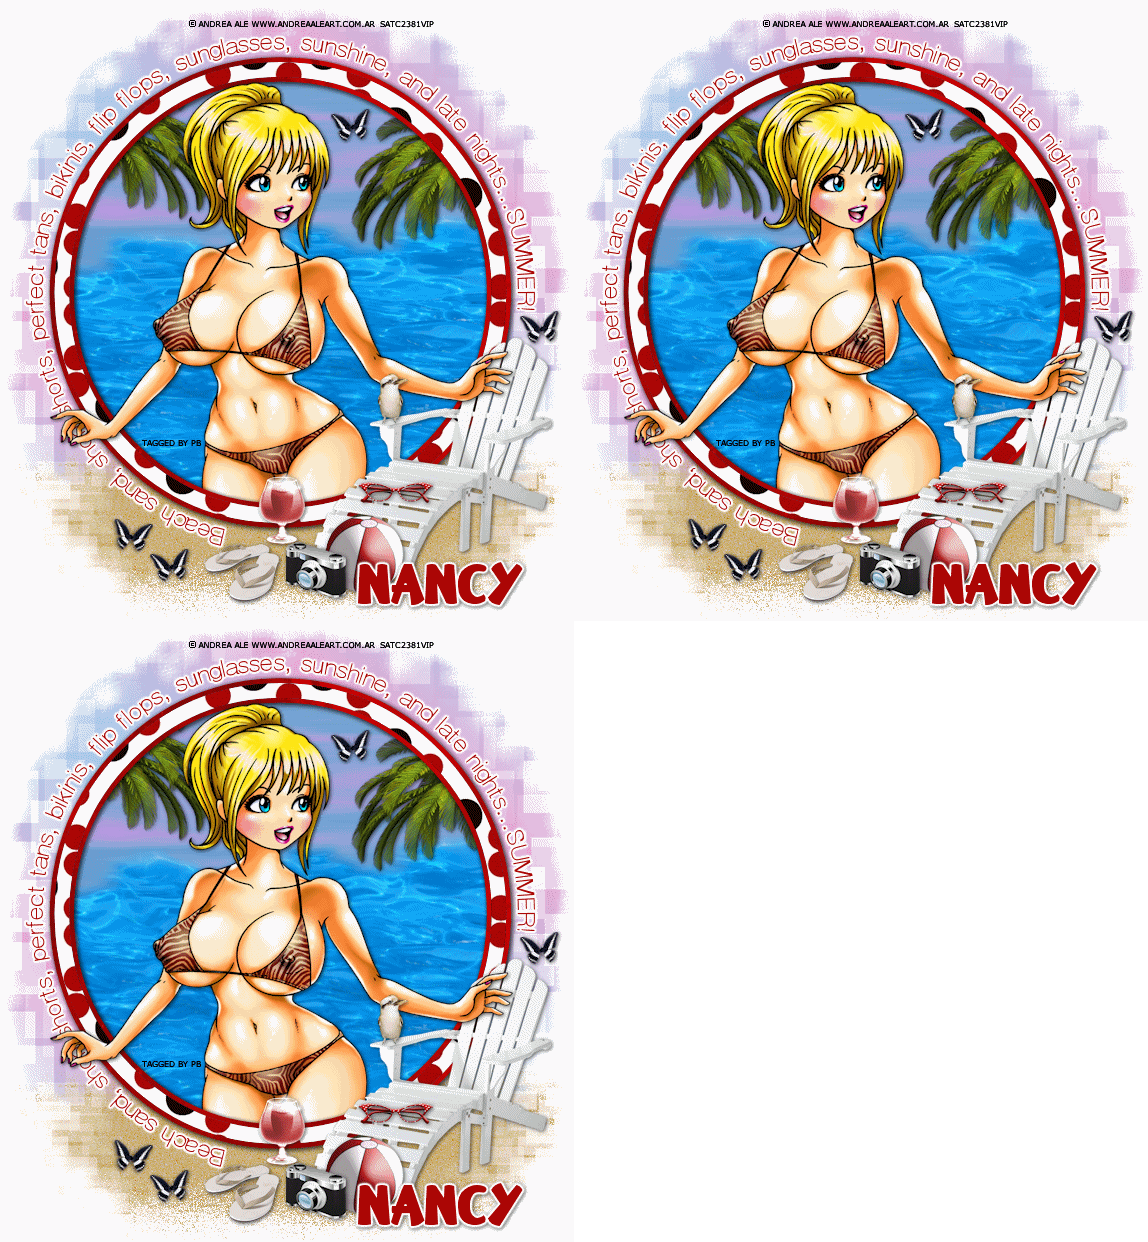
Tube of choice, I am using andrea Ale found at SATC
Scrap kit Summer Lolita by Tasha’s Playground, also found at SATC
Eyecandy 4000 - Jiggle (for water movement)
My Supplies (mask, word art and frame template) here
Mask of choice

Open a new image, 700 x 700 with a white background. 

Copy and paste the frame template as a new layer. Go to selections - Select All - Float - Defloat.

Copy and paste a paper of choice above the frame layer, position to your liking. Go to Selections - Invert and hit delete on the keyboard. Delete the frame template. 

Still on the frame layer, go to Selections - Select All - Float - Defloat. Back to Selections - Modify - Select Selection Borders and use 5. Copy and paste a paper of choice below the frame. Go to Selections - Invert and hit delete on the keyboard. Merge the two frame layers. Apply a drop shadow.

Click inside the frame with the Magic Wand, go to Selections - Modify - Expand by 5.

Add a new layer below the frame, make a gradient out of two colors for the sky, flood fill this layer. Go to Selections - Invert and hit delete on the keyboard. 

Open Water, copy and paste as a new layer above the gradient. Place about half way down inside the circle. Duplicate, mirror and flip. Place at the bottom. You should have “water” covering the gradient except for at the top, see my tag if needed. DO NOT apply a drop shadow to the water layers. Merge the two water layers. Erase any of the water outside the frame. 

Copy and paste the tube as a new layer. Place in the center of the frame, resize if needed. Apply a drop shadow. Erase any of the tube outside the frame you do not want showing.

Open Palm Tree, resize by 80 percent. Copy and paste as a new layer. Place inside the frame neat the top on the right hand side. Apply a drop shadow. Duplicate, and place on the left hand side, erase any of the tree that’s outside the frame.

Copy and paste the mask layer above the white background. You can also mask your own mask in desired. Position more at the top then at the bottom. 

Copy and paste the word art around the outside of the frame. 

Open Sand, copy and paste at the bottom of the frame, this layer should be above the mask layer, apply the mask to this layer, erase ant of the sand you don’t like. 

Open Chair, resize by 60 percent. Copy and paste as a new layer, place at the bottom on the right hand side. Apply a drop shadow.

Open Glasses, resize by 25, percent. Copy and paste as a new layer. Place on top of the chair to your liking. Apply a drop shadow.

Open Beach Ball, resize by 40 percent. Copy and paste as a new layer. Place at the end of the chair. Apply a drop shadow.

Open Camera, resize by 40 percent, copy and paste as a new layer. Place in front and to the left of the beach ball. Apply a drop shadow.

Open Drink, resize by 30 percent. Copy and paste as a new layer. Place behind the camera. Apply a drop shadow.

Open Flip Flops, resize by 50 percent, copy and paste as a new layer. Place in front and to the left of the drink. Apply a drop shadow.

Open Bird, resize by 25 percent. Copy and paste as a new layer. Place on the arm of the chair, apply a drop shadow.

Open Butterfly, resize by 30 percent. Copy and paste as a new layer. Place to your liking, apply a drop shadow. Duplicate as many as you like. I also rotated mine by 8 degrees left.

Add any copyrights and your name. Crop, resize if desired. If you are not animating than save as a PNG (close background layer first).

For Animation…..

Select the WATER layer, duplicate 2 times for a total of 3 water layers. Leave the bottom water layer the way it is, select the middle water layer, go to the Plugins and find Eyecandy 4000 - Jiggle leave all settings like they are and hit Random Seed a few time, apply. Do the same thing with the top water layer, hitting Random Seed a few times. 

You should have 3 water layers and top two should have been Jiggled…lol. Close off the top two jiggled layers leaving only the bottom water layer (all other layers should be open as well). Copy MERGED…..

Open Animation Shop, and paste as a new animation, go back to PSP and close the bottom layer of water and open the middle one. Copy Merged again, back in Animation Shop paste after current frame. One more time go back to PSP, close the middle water layer and open the top one, copy MERGED. In Animation Shop paste after Current Frame. 

Check the animation, if its to choppy or fast change the Frame Properties to something you like, I used 28.

Once your happy with the movement of the water save as a .gif.

All done!! Pretty easy huh? Thank you for trying one of my tuts, I hope you have enjoyed yourself and I look forward to having you come back again! I would love to see what you have created.


Author: Precious Beauties
• 2:25 PM

Supplies Needed:
Tube of choice, I am using Elias Chatzoudis found at PTE
Scrap kit Beach Bum by Bondage Princess Designs
My Supplies (word art and mask) here

Open a new image by 700 x 700 with white background.

Using the Preset Shape tool draw out a circle, background should be Null and the foreground width should be around 15. Once happy, change to Raster layer. Go to Selections - Select All - Float - Defloat.

Copy and paste a paper of choice above the selected layer, go to Selections - Invert and hit delete on the keyboard. Now go back to Selections - Modify - Select Selection Borders and I used Width 5 and Inside checked. Add a new layer below the frame and flood fill with a color or paper of choice. Merge the two frame layers and apply a drop shadow.

Don’t delete the circle we just to make the frame yet, this will help for getting rid of the extra background and palms.

Copy and paste the mask included in my supplies as a new layer above the white background. Position to your liking.

Copy and paste a paper of choice above the mask layer, position to your liking. Select the circle we made, click inside the circle with the Magic Wand, go to Selections - Invert and select the background layer, hit delete on the keyboard.

Open Palm 01, copy and paste as a new layer below the frame layer, position on the left hand side to your liking. Apply a drop shadow. Duplicate, and position at the top right. Click inside the circle we made again, go to Selections - Invert. Select the tree on the left and hit delete. Now the tree on the right and hit delete. Delete the circle we made.

Open Sand 01, copy and paste as a new layer below the frame and frame background. Place on the lower left hand side below the frame, duplicate and place on the right hand side, do this until you have sand at the bottom of the frame. Merge all sand layers and reposition if needed.

Open Boat 01, resize by 30 percent. Copy and paste as a new layer. Place behind the palm on the left hand side. Apply a drop shadow.

Open Fishnet 01, resize by 80 percent. Copy and paste as a new layer on the top right hand side on top of the frame. Duplicate, mirror and flip, position at the bottom left hand corner.

Copy and paste the tube as a new layer, place outside the frame in the sand at the bottom of the tag. Resize if needed and apply a drop shadow.

Open Bottle 02, resize by 30 percent. Copy and paste as a new layer, place at the bottom of the frame next to the tube, apply a drop shadow.

The rest is really up to you, open as many flowers as you like, resize to your liking. Copy and paste as a new layer. Place on top of the netting and around the sand. Apply a drop shadow to all layers.

Do the same as above for the shells.

Copy and paste the word art as a new layer. They are marked as left and right. You can always add your own or leave them out.

Add any copyrights and your name. Crop, resize if desired. Save as a PNG (close background first).

Thank you for trying one of my tuts, I hope you had fun and look forward to having you back here again. I would love to see what you have created.
Author: Precious Beauties
• 4:15 PM

Supplies Needed:
Tube of choice, I am using Unholy Vault Designs found at PTE
Scrap kit Ladybug Garden by Tasha’s Playground, you can purchase this kit at PFD and SATC
Mask of choice

Open a new image 700 x 700 with a white background.

Open Frame 3, copy and paste as a new layer. Using the Magic Wand click inside the frame. Go to Selections - Modify - Expand by 3.

Copy and paste a paper of choice below the frame, I used paper 1, position to your liking. Go to Selections - Invert and hit delete on the keyboard. Apply a drop shadow to the frame.

Open Flower Scatter, resize by 60 percent. Copy and paste as a new layer. Place in the “grass” apply a drop shadow. Duplicate and mirror.

Open Flower 7, copy and paste as a new layer. Place at the bottom inside the frame. Apply a drop shadow. Duplicate and place more to the right and a little higher up. Move this flower behind the one at the bottom.

Open Ladybug 2, resize by 40 percent. Copy and paste as a new layer. Place on top of the flower that we moved higher up. Apply a drop shadow.

Open Ladybug, resize by 25 percent. Copy and paste as a new layer. Place on top of the lower flower. Apply a drop shadow.

Copy and paste the tube as a new layer. I placed mine outside the frame and to the left. Apply a drop shadow.

Open Flowers, copy and paste as a new layer. Place in front of the tube to your liking. Apply a drop shadow. Duplicate, mirror and flip. Place at the top of the frame on the left hand side.

Open Branch, resize by 80 percent, mirror. Copy and paste as a new layer. Place at the top behind the flowers. Move this layer below the frame background. Apply a drop shadow. Duplicate, mirror. Place behind the flowers at the bottom of the tag.

Open Flower 5, duplicate, resize one by 60 percent and the other by 50 percent. Copy and paste both flower as a new layers. Placing them to your liking on top of the white frame. Apply a drop shadow. Duplicate as many as you like.

Open Boots, resize by 60 percent, mirror. Copy and paste as a new layer. I placed mine behind the tube to the left. Apply a drop shadow.

Open Scatter, resize by 30 percent (don’t close). Copy and paste as a new layer. Place on the right hand side inside the frame. Apply a drop shadow. Now go back to the original and using the Selection tool select one of the ladybugs. Copy and paste as a new layer, placing to your liking. Do this as many times as you like. Apply a drop shadow to all layers.

Copy and paste a paper of choice above the white background layer. Apply the mask to this layer. Delete the mask layer and merge group. Resize mask if needed.

Add any copyrights and your name. Crop, resize if desired. Save as a PNG (close background first).

Thank you for trying one of my tutorials. I hope you have enjoyed yourself and I look forward to having you come back again!! I would love to see what you have created.
Author: Precious Beauties
• 3:24 PM

Supplies Needed:
Tube of choice, I am using Jose Cano found at PTE
Scrap kit Summer Breeze by Tasha’s Playground, you can purchase it at PFD and SATC
My supplies (mask and frame) here

Open a new image 700 x 700 with a white background.

Copy and paste the frame included in my supplies as a new layer. Using the Magic Wand click inside the frame. Go to Selections - Modify - Expand by 10.

Copy and paste a paper of choice, I used paper 1. Place below the frame layer, position to your liking. Go to Selections - Invert and hit delete on the keyboard.

Open Net, copy and paste as a new layer below the frame. Position to your liking, duplicate and merge the two layers together. Erase any of the netting that’s out past the frame.

Open Sand Castle, resize by 50 percent. Copy and paste as a new layer. Place on the right hand side near the top of the “sand”.

Open Sand, copy and paste as a new layer. Place at the bottom of the frame.

Copy and paste the tube as a new layer. Resize if needed. Place to your liking, apply a drop shadow. Reposition the sand of needed.

Open Palm Tree, resize by 80 percent, mirror. Copy and paste as a new layer. Place on the right hand side, move this layer below the tube so the trunk is hidden beneath her arm. Apply a drop shadow.

Open Bubbles and resize by 60 percent. Copy and paste as a new layer. Place above and to the left of the sand castle.

Open Sea Horse, resize by 30 percent. Copy and paste as a new layer. Place on the left hand side on top of the netting. Apply a drop shadow. Duplicate and place somewhere at the top of the frame.

Open Cup of Shells, resize by 40 percent. Copy and paste as a new layer. Place at the bottom of the frame on top of the sand, apply a drop shadow.

Open Coconut, resize by 40 percent. Copy and paste as a new layer. Place near the tree. Apply a drop shadow. Duplicate and place on opposite side. Make sure both are behind the tube.

Open Shell  and Shell 2, resize both by 20 percent. Copy and paste shells around the bottom and in the netting, apply a drop shadow to all layers.

Open Dots, copy and paste above the white background layer, place at the top of the frame to your liking, duplicate and move around to your liking, do this until you are happy with the dots around the frame.

Copy and paste the mask layer included in my supplies, this layer should be right above the white background layer. Position to your liking.

Open Sparkles 2, copy and paste as a new layer right above the frame background. Position the sparkles to your liking.

Add any copyrights and your name. Crop, resize if desired. Save as a PNG (close background first).

Thank you for trying one of my tuts, I hope you had fun and look forward to seeing ya again!! I would love to see what you have created.
Author: Precious Beauties
• 1:49 PM

Supplies Needed:
Tube of choice, I am using Scott See found at ART
Scrap kit Tropical Blast by Crystal’s Creations also found at ART
Template 181 by Additive Pleasures
My Supplies (word art and mask) here

Open the template, duplicate and close the original. Delete the copyright. Resize all layers by 85 percent. Resize canvas by 700 x 700.

Select Raster 4, go to Selections - Select All - Float - Defloat.

Copy and paste a paper of choice above the selected layer.  Resize paper if needed.  Position to your liking, go to Selections - Invert and hit delete on the keyboard. Apply a drop shadow.

Repeat the above steps for the remaining template layers.

Select the square background in the lower left hand corner, go to Selections - Select All - Float - Defloat. Copy and paste the tube as a new layer. Position to your liking.  Go to Selections - Invert and hit delete on the keyboard. Apply a drop shadow.

Open ee37, duplicate and resize one by 80 percent. Copy and paste the resize tree on the left hand side behind the frame and background. Position to your liking. Apply a drop shadow. Copy and paste the full size tree on the right hand side, apply a drop shadow.

Open ee13, resize by 60 percent, copy and paste as a new layer. Place in front and to the left of the large palm tree. Apply a drop shadow.

Open ee23, resize by 40 percent, copy and paste as a new layer, place behind the large palm on the left hand side. Apply a drop shadow. Move this layer below the surf board so the branch is behind it.

Open ee4, resize by 60 percent.  Copy and paste as a new layer, place in the top left hand corner overlapping the palm. Apply a drop shadow.

Open ee2, resize by 30 percent, copy and paste as a new layer. Place at the bottom on the right hand side of the frame. Apply a drop shadow.

Copy and paste the tube as a new layer, place in the center of the template. Resize if needed and apply a drop shadow.

Open ee34, resize by 25 percent. Copy and paste as a new layer. Place beside the beach ball on the left hand side. Apply a drop shadow.

Open ee31, resize by 25 percent, copy and paste as a new layer. Place at the bottom on the right hand side of the surf board. Apply a drop shadow.

Open ee27, resize by 15 percent. Copy and paste as a new layer, place on the  left hand side next to the sun cream. Apply a drop shadow.
Open ee12, resize by 20 percent, copy and paste as a new layer. Place on the left hand side of the frame at the bottom of the template. Apply a drop shadow.

Open ee17, resize by 25 percent. Copy and paste as a new layer. Place to your liking, duplicate as many as you like. Apply a drop shadow to all layers.

Open ee16, duplicate and resize one by 25 percent and the other by 12 percent. Copy and paste the smaller flower as a new layer. Place in the hair of the tube. Apply a drop shadow. Copy and paste the larger flower, place to your liking. Duplicate as many times as you like. Apply a drop shadow to all layers.

Open ee40, copy and paste as a new layer. Position to your liking, move layer behind the tube in the center.

Copy and paste the mask included in my supplies above the white background layer. Position to your liking.

Copy and paste the word art included in my supplies. Place to your liking, I erased the word art at the bottom of the template.

Add any copyrights and your name. Crop, resize if desired. Save as a PNG (close the white background layer first).

Thank you for trying one of my tutorials, I hope you have enjoyed using it and hope to see ya back here again!! I would love to see what you have created.
Author: Precious Beauties
• 11:58 AM
Supplies Needed:
Tube of choice (full or half body and close-up), I am using Robert Alvarado from MPT. Now you can find him at PTE
Scrap kit Sunny Days by A [Space] Between
Template 448 by Divine Intentionz
Mask of choice

Open the template, duplicate and close the original. Delete the copyright, resize all layers by 90 percent. Resize the canvas by 700 x 700. Flood fill Raster 1 with white.

Select the layer Square, go to Selections - Select All - Float - Defloat.

Open a paper of choice, resize to your liking, I used 15 percent. Copy paste as a new layer above the selected layer. Place to your liking. Go to Selections - Invert and hit delete on the keyboard. Delete the template layer.

Repeat the above steps for the remaining template layers.

Select the frame backgrounds, copy and paste the close-up tube as a new layer. Place inside one of the frames. Duplicate and mirror and place in the other. Make sure both are positioned to your liking. Select the frame backgrounds again. Go to Selections - Select All - Float - Defloat. Select one of the tubes, go to Selections - Invert and hit delete on the keyboard. Choose the other tube and hit delete on the keyboard. I changed the Blend Mode on the left one to Multiply and the right one to Hard Light, this is up to you.

Repeat the above steps for the smaller two squares using the smaller tube, only I didn’t change the Blend Mode on these. You may if you like.

Apply a drop shadow to all layers.

Open Element 7, resize by 12 percent, flip. Copy and paste as a new layer. Place in the upper left hand corner above the square and frame. Apply a drop shadow.

Open Element 42, resize by 20 percent. Copy and paste as a new layer. Place in the lower right hand corner of the frame on the left hand side. Apply a drop shadow.

Open Element 11, resize by 10 percent. Copy and paste as a new layer. Place in the center of the flower we just added. Apply a drop shadow.

Open Element 41, resize by 20 percent. Copy and paste as a new layer. Place in the top right corner of the frame on the right hand side. Apply a drop shadow.

Open Element 9, resize by 6 percent. Copy and paste as a new layer. Place in the center of the flower we just added. Apply a drop shadow.

Open Element 4, resize by 10 percent. Copy and paste as a new layer. Place overlapping the bottom of the small square on the left hand side. Apply a drop shadow. Duplicate, mirror and place at the top above the large circle.

Open Element 36, resize by 15 percent. Copy and paste as a new layer. Place at the bottom of the template. Apply a drop shadow.

Copy and paste the full body or half body tube as a new layer. Place in the center of the template. Resize if needed. Apply a drop shadow.

Open Element 48, resize by 60 percent. Copy and paste as a new layer, place in the bottom left hand corner. Apply a drop shadow.

Open Element 49, resize by 60 percent. Copy and paste as a new layer. Place overlapping the bottom of the label we just added. Apply a drop shadow.

Add a new layer above the white background layer, using two colors from the tag make a gradient. Flood fill this layer with the gradient. Apply the mask to this layer. Delete the mask layer and merge group. Resize if needed.

Add any copyrights and your name.

Crop, resize if desired. Save as a PNG (close white layer first).

Thank you for trying one of my tutorials. I hope you have had fun and wish to see ya back here for more! I would love to see what you have created.
Author: Precious Beauties
• 6:57 PM
Supplies Needed:
Tube of choice, I am using Legends Art from MPT which is now closed
Scrap kit Splash! by Tasha’s Playground, you can purchase this awesome kit from PFD and SATC
My supplies (mask and background) here

Open a new image 700 x 700 with a white background.

Open Frame 4, copy and paste as a new layer. Using the Magic Wand click in the center of the frame. Go to Selections - Modify - Expand by 5.

Copy and paste the background included in my supplies as a new layer. Using the Pick tool pick until it reaches the under the frame. You can also just resize instead of using the Pick tool.

Copy and paste the Sand as a new layer, place inside the bottom of the frame. Duplicate and merge the two layers, position to one side. Duplicate and place on the opposite side.

Copy and paste the tube as a new layer, place near the bottom between the sand and the water. Resize if needed. Apply a drop shadow.

Select the Magic Wand, click inside the frame, go to Selections - Modify - Expand by 5. Selecting each of these layers hit delete on the keyboard, the background image, both sand layers and the tube. You should now have nothing out past the frame.

Select the inside of the frame again with the Magic Wand, go to Selections - Modify - Expand by 5. Add a new layer above the white background layer, flood fill with a gradient matching the tube or kit.

Copy and paste the mask layer included in my supplies, move above the white background layer. Recolor if desired. Resize if desired.

Duplicate the mask layer, move above the background image, change the Blend Mode to Color (L) and Opacity to 89.

Open Sparkle 2, copy and paste as a new layer above the changed mask layer. Position at the top.

Open Bottle, resize by 40 percent. Copy and paste as a new layer. Place inside the frame in the sand. Apply a drop shadow.

Open Shell and resize by 25 percent.. Copy and paste as a new layer. Place beside the bottle. Apply a drop shadow.

Open Seaweed 2, resize by 50 percent. Copy and paste as a new layer. Place in the bottom right hand corner inside the frame. Apply a drop shadow. Duplicate, and move above the frame and to the left a little bit.

Open Seaweed, resize by 20 percent. Copy and paste as a new layer. Place in the bottom left hand corner in front of the tube, apply a drop shadow, duplicate and place more in the center.

Open Anchor, resize 60 percent. Copy and paste as a new layer. Place in the bottom right hand corner on top of the frame. Apply a drop shadow.

Open Bow, resize by 50 percent. Copy and paste as a new layer. Place on top of the anchor. Apply a drop shadow.

Open Clam, resize by 30 percent, mirror. Copy and paste as a new layer. Place below the anchor and to the left a little bit. Apply a drop shadow.

Open Flower, duplicate. Resize one by 60 percent and the other by 40 percent. Copy and paste the larger flower as a new layer. Place at the bottom of the frame about in the center. Apply a drop shadow. Duplicate and place in the top right hand corner. Duplicate again and place right behind the one we just added. Duplicate one more time and move to the top left hand corner. Copy and paste the smaller flower. Place beside the larger flower at the bottom. Apply a drop shadow. Duplicate and place on the right hand side next to the two larger at the top right. Duplicate and place on the top left hand side.

Open Star, resize by 30 percent. Go to Image - Free Rotate and rotate 15 degrees left. Copy and paste as a new layer. Place at the top left hand corner overlapping the flowers. Apply a drop shadow. Duplicate and place on the remaining flowers, don’t forget to mirror once in a while.

Open Flower 2, resize by 25 percent. Copy and paste as a new layer. Place at the bottom of the tag on the right hand side next to the clam. Apply a drop shadow.

Open Shell 2, resize by 25 percent. Copy and paste as a new layer. Place inside the clam. Apply a drop shadow.

Open Marble, resize by 20 percent. Copy and paste as a new layer. Place to your liking at the bottom of the tag. Apply a drop shadow. Duplicate as many as you like.

Resize all layers by 90 percent.

Add any copyrights and your name.

Crop, save as a PNG (close background layer first).

I hope you have enjoyed using one of my tutorials. I hope to see ya back here for more fun! I would love to see what you have created.
Author: Precious Beauties
• 9:11 PM
Supplies Needed:
Tube of choice, I am using Elias Chatzoudis now found at PTE
Scrap kit Fun in the Sun by Dreamland Designs
Mask of choice

Open a new image 700 x 700 with a white background.

Open Frame, copy and paste as a new layer. Using the Magic Wand click inside the frame, go to Selections - Modify - Expand by 2.

Copy and paste a paper of your choice as a new layer below the frame. Position to your liking. Go to Selections - Invert and hit delete on the keyboard. Apply a drop shadow.

Open Sand Castle, resize by 50 percent, mirror. Copy and paste as a new layer. Place in the lower left hand corner inside the frame. Erase any of the castle out paste the frame. Apply a drop shadow.

Open Seagull, resize by 50 percent, copy and paste as a new layer. Place at the top of the frame about in the center. Apply a drop shadow.

Open Palm Tree, duplicate, resize one by 70 percent and the other by 60 percent. Copy and paste the one resized by 70 percent as a new layer. Place on the left hand side of the frame. Apply a drop shadow. Copy and paste the smaller palm as a new layer, place below the palm tree on the left hand side. Apply a drop shadow. Duplicate, mirror and place at the bottom of the frame on the right hand side.

Open Surfboards, resize by 30 percent. Copy and paste as a new layer. Place in front of the palm tree on the right hand side. Apply a drop shadow.

Copy and paste the tube as a new layer, place on the left hand side in front of the palm trees. Resize if needed and apply a drop shadow.

Open paper 24, using the Selection tool select a portion of the sand. Copy and paste as a new layer below the frame layer. Apply a mask to this layer. Position to your liking and use the eraser to erase any of the sand you don’t like. Place at the bottom of the tag. See my tag if needed.

Open Crab, resize by 10 percent. Copy and paste as a new layer. Place in the sand we just added. Apply a drop shadow.

Open Seashells 1, resize to your liking, copy and paste as many as you like adding them to the sand.

Using two colors from the tube or tag make a gradient. Add a new layer above the white background layer. Flood fill this layer with the gradient. Apply the mask to this layer. Delete the mask layer and merge group. Resize if needed.

Add any copyrights and your name.

Crop, resize if desired. Save as a PNG (close background layer first).

Thank you for trying one of my tuts, I hope you have had fun and come back for more!! I would love to see what you have created!
Author: Precious Beauties
• 4:12 PM

Supplies Needed:
Tube of choice (close-up and full), I am using Elias Chatzoudis found at PTE
Scrap kit Some Beach by Melissaz Creationz or 4Shared Link
Please visit Melissa's site, its well worth it, the 4shared link is only posted in case you can't find the kit on her site.
Mask of choice

So looking forward to summer and the beach!

Open a new image 600 x 250 with a  white background.

Select the white background, go to Selections - Select All - Float - Defloat.

Add a new layer above the white background, right click and paste into selection.

Open the close-up tube, paste as a new layer. Resize if needed. Place on the left hand side. Apply a drop shadow. Change the Blend Mode to Overlay.

Select the white background, go to Selections - Select All - Float - Defloat.

Open the sand background paper, right click and paste into selection. Apply the mask to this layer. Delete the mask layer and merge group. Apply a small drop shadow.

Copy and paste the netting (raster 27) as a new layer. Place on the right hand side. Apply a drop shadow.

Copy and paste the rope with the shells (raster 31) as a new layer. Place to your liking, apply a drop shadow. Duplicate and mirror. Reposition to your liking.

Copy and paste Some Beach word art (raster 22) as a new layer. Place on the left hand side. Recolor to match the tube. To do this I selected the word art, go to Selections - Select All - Float - Defloat. Add a new layer above the word art. Flood fill with the color or gradient you would like to use. Go to Selections - Invert and hit delete on the keyboard. Change the Blend Mode to Color.

Copy and paste the full tube as a new layer. Place on the right hand side. Resize if needed, apply a drop shadow.

To add a frame select a color or gradient.

Select the white background layer, go to Selections - Select All - Float - Defloat. Go to Modify - Select Selections Borders and set at 5. Select None. Make sure this layer is at the top.

Repeat the above steps for the thin white frame layer only this time change the border setting to 7 and fill with white. Place this layer below the colored one.

Add any copyright and your name.

Save as a PNG.

Thank you for trying one of my tutorials. I hope you have enjoyed using it enough to come back for more! I would love to see what you have created!!

* To make the avatar open a new image 150 x 150. Close the layers from the full tube up. Copy merged, and paste as a new layer above the white background. Place to your liking, copy the tube and resize. Add copyrights and your name. Make a frame the same as you did for the signature. Pretty easy huh!?! ALL FINISHED!
Author: Precious Beauties
• 1:59 PM
Supplies Needed:
Tube of choice, I am using Elias Chatzoudis found at PTE
Scrap kit Mermaidia by Scrappin Krazy Designs
Cluster Frame by Julie’s Jazziness
My Supplies (dolphins and word art) here
Mask of choice

Open a new image 700 x 700 with a white background.

Open the cluster frame and resize by 80 percent. Copy and paste as a new layer.

Open a paper of choice, resize about 80 percent. Copy and paste below the frame. Select the Selection tool, using a rectangle setting, draw out a rectangle on top of the frame. Once you have it drawn to your liking, select the paper and go to Selections - Invert and hit delete on the keyboard. Now you should have a background without any gaps. Apply a drop shadow to the cluster frame.

Open Element 30, copy and paste as a new layer in the bottom left hand corner inside the frame. Apply a drop shadow. Erase any of the net out past the frame.

Open Element 32, copy and paste as a new layer. Place in the upper right hand corner inside the frame. Apply a drop shadow. Erase any of the leaves out past the frame.

Open Element 31, copy and paste as a new layer, place on top of the larger leaves in the upper right hand corner. Apply a drop shadow. Erase any of the leaves out past the frame.

Open Element 33, copy and paste as a new layer. Place around the outside of the frame. Move this layer below the frame background. Apply a drop shadow. Duplicate as many as you like.

Copy and paste the tube as a new layer, resize if needed. Apply a drop shadow.

Open Element 46, resize by 40 percent. Copy and paste as a new layer. Place the flower overlapping the tube and the flowers on the frame on the right hand side. Apply a drop shadow. Duplicate and place at the top right of the frame. See my tag for reference if needed.

Open Element 49, resize 30 percent, copy and paste as a new layer. Place beside the flower overlapping the tube, apply a drop shadow. Duplicate, and place on the other side. Duplicate a few more times and place to your liking.

Open Element 16, resize by 80 percent, copy and paste as a new layer. Place on the tube. Duplicate if needed.

Open Element 35, copy and paste as a new layer. Place under the tube.

Open Element 13, resize by 25 percent, copy and paste as a new layer. I placed one by the tube and another on the netting. Apply a drop shadow.

Open Element 15, resize by 20 percent, copy and paste as a new layer. Place to your liking. Apply a drop shadow.

Open the dolphins included in my supplies, resize if desired. I resize mine by 80 percent. Copy and paste as a new layer somewhere in the “water” if you have it.

Copy and paste the word art included in my supplies. Placed to your liking.

Add any copyrights and your name.

Crop, resize if desired. Save as a PNG (close background layer first).

Thank you for trying one of my tutorials. I hope you found it fun and come back for more! I would love to see what you have created.
Author: Precious Beauties
• 12:24 PM
Supplies Needed:
Tube of choice, I am using one of Carlos Cartagena that was from MPT but is now with PTE
Scrap kit A Touch of Paradise Add-On by Designed By Stina
Mask of choice
My Supplies found here (background image and butterflies)
Background Image © Andrea Kosslick

Its so nice here today, in the 70's! I was ready for something warm, so this is what I came up with...lol.

Open a new image 700 x 700 with a white background. We will crop later so don’t worry about the size for now.

Open Frame 07 and resize by 55 percent. Copy and paste as a new layer.

Open a paper of choice, resize by 60 percent and paste as a new layer below the frame. Select the Selection tool and draw a square out on top of the pink frame. Once this is done go to Selections - Invert and hit delete on your key board.

Open the Background Image included in my supplies, copy and paste as a new layer. Repeat above steps to delete the excess image. Now you should have a background paper and an image below the frame.

Select the frame layer, duplicate, go to Adjust - Blur - Gaussian Blur - Radius at 3.00. Move this layer below the other frame. Apply a drop shadow.

Open a paper of choice and paste as a new layer above the white background, or add a new layer and flood fill with a gradient from the tube or scraps. Apply the mask to this layer. Delete the mask layer and merge group. Resize if needed.

Open Frame 01 and resize by 60 percent. Copy and paste as a new layer above the mask. Position on the left hand side out past the frame. Apply a drop shadow. Duplicate, mirror and position on the right side just out past the frame. Erase any of the frame from this layer that is showing on the left side. Duplicate once more, go to rotate and rotate right. Make sure that All Layers is NOT checked. Erase any of this frame that is overlapping the bottom.

Copy and paste the tube as a new layer. Position on the right hand side in front of the frames. Apply a drop shadow.

Open Surfboard and resize by 60 percent. Copy and paste as a new layer. Position on the right side behind the tube. Apply a drop shadow.

Open Cocktail 01 and resize by 15 percent. Copy and paste as a new layer. Place some where in front of the tube. Apply a drop shadow.

Open Flower 02 and resize by 30 percent. Copy and paste as a new layer. Place at the top left of the frame. Apply a drop shadow.

Open Flower 04 and resize by 25 percent. Copy and paste as a new layer. Place this one overlapping the blue flower on the left side. Apply a drop shadow.

Open Bow 01 and resize by 20 percent, go to Image - Free Rotate and rotate left 10 degrees. Copy and paste as a new layer on the left hand side just below where the two frame meet. Apply a drop shadow.

Open Flower 03 and resize one by 25 percent and another by 15 percent. Copy and paste the larger one as a new layer. Place near the top of the surf board. Apply a drop shadow. Now copy and paste the smaller one as a new layer, place this one on top of the blue flower on the right side. Apply a drop shadow. Duplicate and place on top of the pink bow.

Open Beach Ball and resize by 15 percent. Copy and paste as a new layer. Position at the bottom left hand corner of the frames. Apply a drop shadow.

Open Flower 11 and resize by 25 percent. Copy and paste as a new layer. Place in front of the tube. Apply a drop shadow.

Open Flower 12 and resize by 15 percent. Copy and paste as a new layer. Place in front overlapping the flower we just added in front of the tube. Apply a drop shadow. Duplicate, mirror and place in front of the beach all to the left.

Add any copyrights and your name.

Crop, resize if desired.

Save as a PNG.

Now you are ready to show off your new tag, I hope you have enjoyed using one of my tuts. I would love to see what you have created.
Author: Precious Beauties
• 6:12 PM
Supplies Needed:
Scrap kit Aqua Rebel by Scraps by Jessica
Tube of choice, I am using one of Carlos Cartagena purchased from MPT
My Supplies (shells and background image) here
Plugin Alien Skin Splat - Edges (optional)

Okay, ready to start?
Awesome!

Open a new image 700 x 700 with a white background. We will crop later.

Open a paper of choice, paste as a new layer. Go to the plugins and select Alien Skin Splat. Look for the one called Edges, apply this using the following settings:
Edge Width - 40
Margin - 0
Feather Size - 40
Direction - 45
Edge Mode - Halftone Dots
Transparent Fill - checked
Go to Image - Free Roate 5 degrees left.

Open the Papermat, and paste as a new layer. Go to Image - Free Rotate 10 degrees right.

Leave these two layers the way it is for now, we will be coming back to them in a minute.

Open Frame 1 and resize by 90 percent then go to Image and rotate right. Paste as a new layer. Apply a drop shadow.

Okay now we are going to resize the bottom two layer we just added before the frame. Select the papermat and resize around the frame. Allow some of the mat to stick out from below the frame. I used the Pick tool for this but you can just go to resize if you perfer. Do the same for the paper we added the halftone to. Apply a drop shadow to the papermat.

Open and copy the background included in my supplies or use something else you like. Paste as a new layer, move this layer below the frame. Take your Selection tool and draw out a square staying on top of the frame. Once you have this to your liking go to Selections - Invert and hit delete on your keyboard.

Open Wavy Ribbon and resize by 80 percent. Paste as a new layer, position on the right side between the two bottom papers. Apply a drop shadow. Duplicate, rotate right. Position at the top just below the frame.

Open the Staple and resize by 50 percent. Paste as a new layer, position about half way down the frame on the left side. Apply a drop shadow. Duplicate and place this one a little higher up on the right side.

Open and paste your tube as a new layer, resize if needed. Erase anything at the bottom of the frame that is sticking out. Apply a drop shadow.

Open Rope and paste as a new layer. Position in the upper left corner on top of the frame. Apply a drop shadow.

Open Bow 9 and resize by 40 percent. Paste as a new layer. Place right below the knot in the rope. Apply a drop shadow.

Open Bow 7 and resize by 30 percent. Paste as a new layer. Position this one on top of the bow we just added. Apply a drop shadow.

Open Dragonfly and resize by 30 percent, paste as a new layer. Position on top of the rope near the middle. Apply a drop shadow.

Open Flower 5 and resize by 40 percent. Paste as a new layer. Position just above the staple on the right hand side. Apply a drop shadow. Duplicate and place on the left side near the bottom corner. Move flower layers right below the papermat layer.

Open Flower 3 and resize by 50 percent. Paste as a new layer and position below the white flower on the right hand side. They should be overlapping. Apply a drop shadow.

Open Flower 4 and resize by 30 percent. Paste as a new layer. Move this layer above the frame layer. Position at the bottom of the left hand side overlapping the white flower. Apply a drop shadow. Duplicate and place in the upper right corner of the frame.

Open Fastener and resize by 40 percent. Paste as a new layer. Position in the lower left corner of the frame. Apply a drop shadow. Duplicate and place in the upper right corner of the frame.

Open the Shells included in my supplies, paste as a new layer. Position at the bottom of the frame. Apply a drop shadow.

Add any copyrights.

Add your name.

Crop, resize if desired.

Save as a PNG.

You now have a new tag! I hope you have enjoyed using one of my tuts. I would love to see what you have created.
Author: Precious Beauties
• 7:39 PM
Supplies Needed:
Tube of choice, I am using on of Al Rio purchased at CILM which is now closed
Scrap kit Fun In The Sun by Designed By Miss Heather
Tag Template DBA Template 188 by Designs by Ali
Mask of choice.

Ready to begin?
Awesome!

Open the template and resize all layers by 80 percent then to go Image and resize canvas 700 X 700. Select the bottom layer in the template and flood fill with white, this is now your back ground layer.

Select the black rectangle, go to Selections - Select All - Float - Defloat

Open and paste Fun In The Sun paper 10 above the black rectangle, to to Selections - Invert. Hit delete on your key board.

Delete the black rectangle template layer.

Select the one of the large red circles, go to Selections - Select All - Float - Defloat

Open and paste Fun In The Sun paper 6, to to Selections - Invert. Hit delete on your key board.

Repeat for the remaining red circles.

Select the one of the large grey circle, go to Selections - Select All - Float - Defloat

Open and paste Fun In The Sun paper 2, to to Selections - Invert. Hit delete on your key board.

Repeat for the remaining grey circles.

Apply drop shadows to all layers.

Paste your tube as a new layer, I mirrored mine and positioned to the left. Apply a drop shadow to this as well.

Open Fun In The Sun 59 and resize by 60 percent, paste as a new layer kind of in the center of the blue rectangle. See my tag for reference if needed. Apply a drop shadow.

Open Fun In The Sun 10 and resize by 25 percent, paste as a new layer in front of your tube. See my tag for reference if needed. Apply a drop shadow.

Open Fun In The Sun 89 and resize by 50 percent, paste as a new layer in front of the fence in the right side. See my tag for reference if needed. Apply a drop shadow.

Open Fun In The Sun 30 and resize by 40 percent then again by 50 percent, paste as a new layer in front of the fence near the middle. See my tag for reference if needed. Apply a drop shadow.

Open Fun In The Sun 85 and resize by 30 percent then again by 60 percent, paste as a new layer on top of the orange small circle on the left. See my tag for reference if needed. Apply a drop shadow.

Open Fun In The Sun 90 and resize by 20 percent, paste as a new layer position in front of your other drink on the left hand side. See my tag for reference if needed. Apply a drop shadow.

Move the small red rectangle down some, also move the dots down. See my tag for reference. Pick a color from your tube and flood fill the red rectangle, apply a drop shadow.

Choice a darker color from the flood fill color and type the words Fun in the Sun. Once happy convert to raster layer and position where you like it. Apply a drop shadow.

Duplicate your starfish layer and mirror, position to the right overlapping the surf board. See my tag for reference if needed

copy and paste as a new layer a paper of your choice above the white background layer. Apply your mask. Resize if desired or you can use the pick tool to resize to your liking.

Open Fun In The Sun 89 and resize by 20 percent then again by 80 percent, paste as a new layer position in front on top of the fence kind of in the middle. See my tag for reference if needed. Apply a drop shadow.

Add copyrights.

Add your name.

Crop, and resize if desired.

Save as a PNG.

All finished, hope you enjoyed using one of my tuts, I would love to see what you have created.
Author: Precious Beauties
• 11:32 AM
Supplies Needed:
Tube of choice, I am using one of Elias, you can find him here.
Scrap kit Summer Vacations from Jaelop Designs, found here
Mask WSL_37 from Missy

Ya ready to begin?
Good, so am I!

Open a new image 700 x 700 with white background.

Open element 74, resize by 30 percent, then by 80 percent. Paste as a new layer and drop shadow.

Click inside the frame with your magic wand, go to Selections - Modify by 5.

Open paper 3, resize by 30 percent, add a new layer above your white background.
Paste your paper into the selection.

Copy and paste your tube as a new layer, position where you like it and add a drop shadow.

Open element 21, resize by 20 percent and paste as a new layer. Position above your tube and to the right. Add a drop shadow.

Open element 18, resize by 30 percent and then by 70 percent. Paste as a new layer and add a drop shadow. Move behind your tube layer.

Open element 48, resize to your liking and paste behind your tube to the left. See my tag for reference if needed. Apply a drop shadow.

Open element 4, resize 30 percent and then by 70 percent. Paste as a new layer and move to your liking. Apply a drop shadow.

Open element 7, resize by 40 then 50 percent and paste as a new layer. Position to the left of your frame. Free rotate left 15 degrees. See my tag for reference if needed. Apply a drop shadow.

Open element 3, resize by 10 percent, free rotate 8 degrees. Paste as a new layer and move to the bottom left. Apply a drop shadow.

Open element 11, resize by 15 percent. Paste as a new layer and move to the bottom right of your tube. See my tag for reference if needed. Apply a drop shadow.

Open paper 4, resize and paste as a new layer above your white background. Apply your mask and resize if needed. Merge group and duplicate.

Open element 79, resize to your liking, tale your selection tool and select the bottom line of the word art. Paste as a new layer and change blemd mode to overlay. Drop shadow and then duplicate, merge down.

Add copyright and your name.

Crop and resize if needed.

Save as a PNG

You are finished!

I woud love to see what you created using my tutorial!